5 Steps to an Organized Playroom
Ask yourself these questions to design your perfect space.

by Jess Wartinger
Jan 07, 2019
If your playroom is anything like ours, it’s filled (to exploding) with almost every toy imaginable. Over the years, we’ve added shelving, bins, and baskets, yet pickup continued to be a chore.
So, after almost nine years of parenting, we decided to organize our playroom. While this project wasn’t completed in a day, the benefits have far outweighed any hassle that came with reorganization.
Perhaps, as the new year is upon us, you’re also looking for a way to organize your family’s space. Whether it’s getting the baby toys from underfoot or transitioning to a more grown-up area for your older kids, these steps are key for an organized playroom.
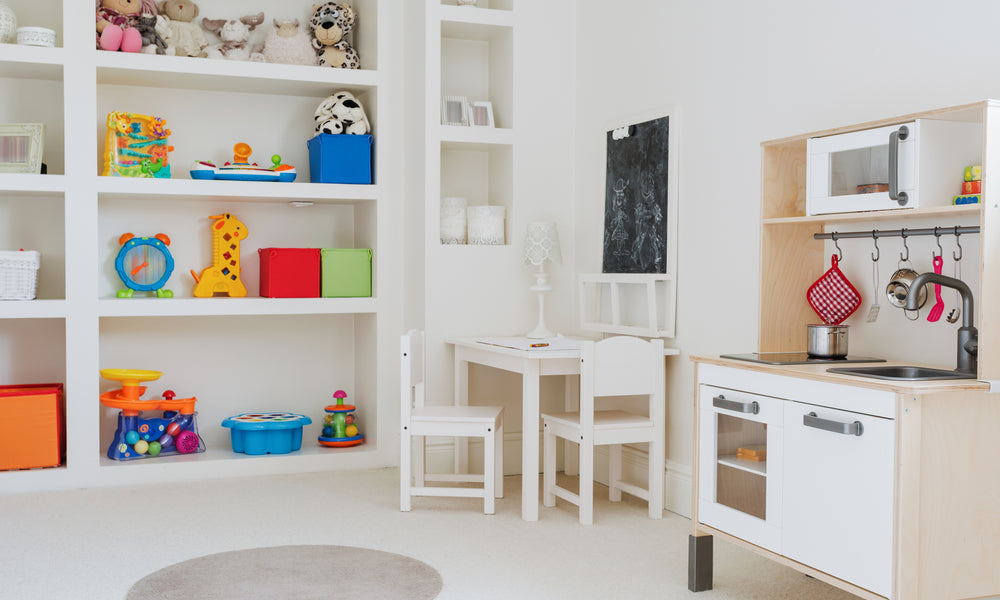
5 Steps to an Organized Playroom
Step #1: Observe Carefully
Long-lasting organization doesn’t begin with purchasing baskets from your nearest store.
If you’re toying around with the idea of organizing your family space, it’s time to observe. Set aside several days (or more) to spend time in the playroom. Ask yourself the following:
1. What am I currently using for organization? What parts of this are working for our family?
2. Who uses this space the most?
3. What items are being used in this space? What items are sitting unused?
Plan to spend time with your children in your play area. Sit with them; note what’s comfortable and what’s lacking. See what holds their interest and what is just “stuff” surrounding them. Take notes, take pictures, and begin thinking about what could be different.
Step #2: Determine Your Needs (and Wants)
When you’re about to tackle a new project, it’s easy to think big. There’s inspiration from Pinterest, TV, and even your neighbors' houses to consider. But, before you spend money on storage solutions, it’s time to determine what your needs really are.
Take a look at your space and decide what type of storage fits your family. Ask yourself the following:
1. Do I want open storage, so all toys are accessible for my children at all times?
2. Do I want closed storage, so I am in control of what toys are out and being played with?
3. Do I want a combination of open and closed storage, so I can rotate what toys are accessible but the majority of items children will need help to access?
Once your know what type of storage options you prefer, it’s time to look at your space. Determine how much room for storage you have. Remember to include what types of seating you want available, as well as leaving a large area of floor space for playing on.
Shop
Article Continues Below Advertisement
Step #3: Organize without Little Helpers
Perhaps you’ve purchased new storage options, or you’re redefining how your old ones should be used. Either way, plan a time without little helpers to do the major toy organization.
Start with the standard three-pile system. Consider sorting as follows:
1. Keep: Items in good condition and are played with regularly.
2. Give: Items in good condition but aren’t played with consistently.
3. Trash: Items that have broken/missing pieces and aren’t needed any longer.
Your first pile is likely your largest and what you’ll be working to organize. Begin by grouping like object such as: Vehicles, Play Food, Dress Up, Blocks, Trains, Learning Toys, etc.
Baskets and bins are your friend when trying to store toys. Denote a basket for each category of toys that you have. Books can be grouped by author or type, with some favorites in a basket and the rest on a bookshelf in your child’s room. Consider putting board games (and other items with small parts) in closed storage so they aren’t accessible for your littlest ones.
Realistically look at your space. You might find you still have too many items to fit on your shelving or in your cabinets. If that’s the case, consider what your children are most likely to play with and place those items easily accessible.
Step #4: Try it Out
Trying out a new system is often the organizational part that’s skipped over.
Once you’ve weeded through your toys and organized your space, plan to spend a week or two trying it out. Sit in your playroom with your children and, again, observe them.
Are they actively engaging with toys or just dumping out the bins you so tediously organized? Are they able to help in the process of picking up and returning the play space back to an neatened area? Are there items that they haven’t played with since I organized?
Step #5: Regroup and Reorganize
After your trial period, it’s time to regroup.
As yourself:
1. Overall, how is the play area working? Are children engaged and playing appropriately?
2. How easy is it to maintain order and pick up the area?
From there, decide if any changes are needed. Sometimes just a few quick tweaks in how much is accessible or where items are stored is enough to make the space easier to maintain. Other times you might find toys that aren’t used regularly that can be given away.
Don’t give up! With a little observation, thinking, and sorting your kids can have a playspace that is as fun as it is functional.

Jess Wartinger
Jess Wartinger resides in rural New York with her husband and five children. Formerly an early elementary teacher, Jess currently spends her time loving her kids and holding down the fort at home.